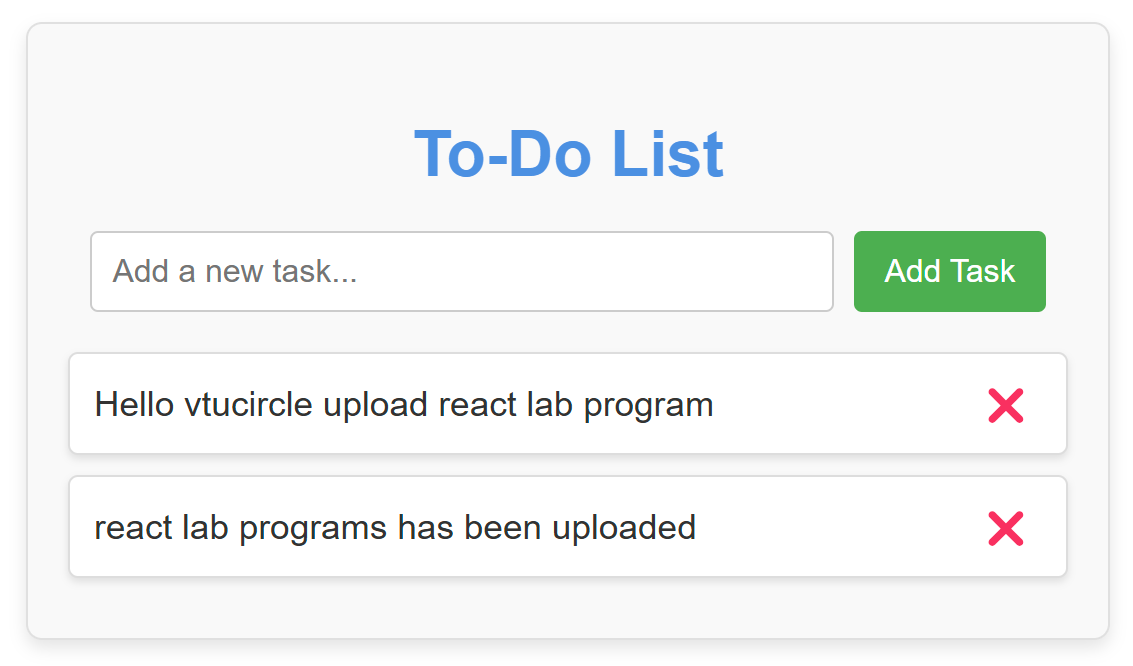
4. Develop a To-Do List Application using React functional components that demonstrates the use of the useState hook for state management. Create a functional component named ToDoFunction to manage and display the to-do list. Maintain a list of tasks using state. Provide an input field for users to add new tasks. Dynamically render the list of tasks below the input field. Ensure each task is displayed in a user-friendly manner. Allow users to delete tasks from the list. Mark tasks as completed or pending, and visually differentiate them.
Step 1: Create a New React Application
First, you need to create a new React app using below command. Open your terminal and run:
npx create-react-app todo-appThis will set up a new React project in a folder called todo-app. After the installation is complete, navigate to the project directory:
cd todo-appStep 2: Modify the App.js File
- Navigate to the
srcfolder in the file explorer on the left-hand side of VSCode. - Open the
App.jsfile (which contains the default template code). - Replace the content of
App.jswith the code provided for the todo-app. Here’s the code to replace insideApp.js:
import React, { useState } from 'react';
import './App.css';

const ToDoFunction = () => {
  const [tasks, setTasks] = useState([]);
  const [newTask, setNewTask] = useState('');

  const addTask = () => {
    if (newTask.trim()) {
      setTasks([
        ...tasks,
        { id: Date.now(), text: newTask, completed: false },
      ]);
      setNewTask('');
    }
  };

  const deleteTask = (taskId) => {
    setTasks(tasks.filter(task => task.id !== taskId));
  };

  const toggleTaskCompletion = (taskId) => {
    setTasks(tasks.map(task =>
      task.id === taskId
        ? { ...task, completed: !task.completed }
        : task
    ));
  };

  return (
    <div className="todo-container">
      <h2 className="todo-header">To-Do List</h2>

      <div className="todo-input-wrapper">
        <input
          type="text"
          value={newTask}
          onChange={(e) => setNewTask(e.target.value)}
          placeholder="Add a new task..."
          className="todo-input"
        />
        <button className="add-task-button" onClick={addTask}>Add Task</button>
      </div>

      <ul className="todo-list">
        {tasks.map((task) => (
          <li
            key={task.id}
            className={`todo-item ${task.completed ? 'completed' : ''}`}
          >
            <span
              className="task-text"
              onClick={() => toggleTaskCompletion(task.id)}
            >
              {task.text}
            </span>
            <button
              className="delete-button"
              onClick={() => deleteTask(task.id)}
            >
              ❌
            </button>
          </li>
        ))}
      </ul>
    </div>
  );
};

export default ToDoFunction;
Step 3: Modify the App.css (Optional)
You can adjust the styling if desired. For example, you can modify App.css to ensure the buttons look good:
.todo-container {
  font-family: 'Arial', sans-serif;
  max-width: 500px;
  margin: 50px auto;
  padding: 20px;
  border: 1px solid #e0e0e0;
  border-radius: 8px;
  background-color: #f9f9f9;
  box-shadow: 0 4px 8px rgba(0, 0, 0, 0.1);
  text-align: center;
}

.todo-header {
  color: #4A90E2;
  font-size: 2rem;
  margin-bottom: 20px;
}

.todo-input-wrapper {
  display: flex;
  justify-content: center;
  margin-bottom: 20px;
}

.todo-input {
  width: 70%;
  padding: 10px;
  border-radius: 4px;
  border: 1px solid #ccc;
  font-size: 1rem;
  outline: none;
}

.add-task-button {
  padding: 10px 15px;
  margin-left: 10px;
  background-color: #4CAF50;
  color: white;
  border: none;
  border-radius: 4px;
  font-size: 1rem;
  cursor: pointer;
  transition: background-color 0.3s;
}

.add-task-button:hover {
  background-color: #45a049;
}

.todo-list {
  list-style-type: none;
  padding-left: 0;
  margin: 0;
}

.todo-item {
  display: flex;
  align-items: center;
  justify-content: space-between;
  background-color: #fff;
  padding: 12px;
  margin: 10px 0;
  border-radius: 5px;
  border: 1px solid #ddd;
  box-shadow: 0 2px 4px rgba(0, 0, 0, 0.1);
  transition: transform 0.2s ease-in-out;
}

.todo-item:hover {
  transform: scale(1.03);
}

.todo-item.completed {
  background-color: #f1f1f1;
  text-decoration: line-through;
  color: #aaa;
}

.task-text {
  cursor: pointer;
  font-size: 1.1rem;
  color: #333;
  transition: color 0.3s;
}

.task-text:hover {
  color: #4CAF50;
}

.delete-button {
  background: none;
  border: none;
  font-size: 1.1rem;
  color: #ff6347;
  cursor: pointer;
  transition: color 0.3s;
}

.delete-button:hover {
  color: #ff4500;
}
You can also remove any default styling from the App.css file that is not needed for this project.
Step 4: Start the Development Server
- In the terminal inside VSCode, run the following command to start the React development
npm start- This will open your browser and navigate to
http://localhost:3000/. You should see your Counter Application up and running.
OUTPUT:

“Fixing the Module not found: Error: Can't resolve 'web-vitals' Error in React”

The error you’re seeing occurs because the web-vitals package, which is used for performance monitoring in a React app, is not installed by default in the project or has been removed. Since web-vitals is an optional package, you can safely resolve this issue by either installing the package or removing the code that imports it.
Option 1: Install the web-vitals package
If you want to keep the performance monitoring functionality and resolve the error, simply install the web-vitals package.
- In the terminal, navigate to your project folder (if not already there):
cd todo-app- Install
web-vitalsby running the following command:
npm install web-vitals- After installation is complete, restart the development server:
npm startThis should resolve the error, and your application should compile correctly.
Option 2: Remove the Web Vitals Code (If Not Needed)
If you don’t need performance monitoring and want to get rid of the error, you can safely remove the import and usage of web-vitals from your code.
- Open
src/reportWebVitals.jsand remove its contents or just comment out the code:
// import { reportWebVitals } from './reportWebVitals';

// You can safely remove the call to reportWebVitals or leave it commented out
// reportWebVitals();- Save the file, and the application should compile without the error. You can now continue developing your app.
